
DesignGen · Transparent Ultra Max output
Lift the artwork. Leave the background behind.
Choose Ultra Max in the T-shirt Designer or Image Studio to create and edit isolated artwork as a transparent PNG—ready for mockups, layout, and print review.
The production handoff
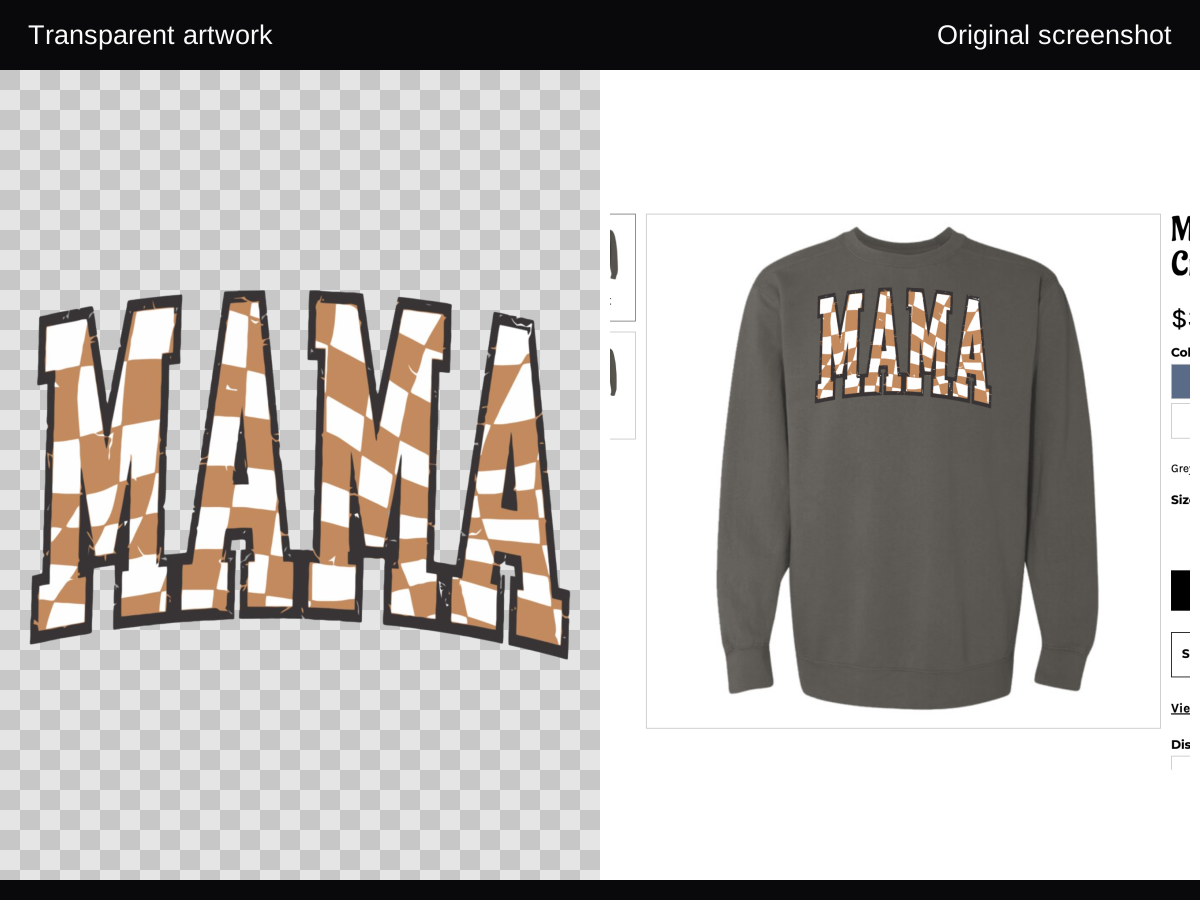
The empty space is part of the file.
A transparent PNG carries alpha information instead of a white rectangle. That means the artwork can sit naturally on garment colors, product mockups, and new layouts.
One tier, two entry points
Start from a prompt. Or rescue the artwork you already have.
T-shirt Designer
Describe the isolated graphic you need, choose Ultra Max, generate, then download or continue into your mockup workflow.
Image Studio
Upload artwork or a garment screenshot, choose Ultra Max for Screenshot to Design or Edit, and review the rebuilt transparent result.
Ultra Max model card
Choose it for the final isolated asset.
Ultra Max is the best fit when transparent output, close instruction following, and a polished edit matter more than rapid concept exploration.
- Choose Ultra Max when
- You need a transparent PNG from a new design, a reference image, Screenshot to Design, or an edit.
- Skip it when
- The background is an intentional part of a scene or you are only exploring rough directions.
- Prepare the input
- Use the cleanest source available, keep the subject readable, and say which details must survive the edit.
- Expect on output
- A PNG requested with transparency. Inspect fine edges, small text, glows, and shadows before production.
- If the edge is wrong
- Edit again with a precise edge instruction, or use Image Studio tools for targeted cleanup.
- Compared with other tiers
- Use other tiers for exploration; they may require a separate background-removal step for isolated artwork.
Review alpha like a production file.
The checkerboard shows through every area meant to be empty.
Fine lines and small counters remain intact at the intended print size.
No pale halo appears when the artwork is previewed on dark fabric.
Any intentional glow or shadow is semi-transparent, not boxed in white.
Know when to make another pass.
Missing detail: return to Edit and name the exact element that must be restored.
White fringe: preview on a dark garment, then request cleaner isolated edges.
Background was intentional: add it after export or use a different tier for scene-first artwork.
Need vector paths: finalize the PNG first, then continue to Vectorize.
Make the artwork ready for wherever it goes next.
Generate or edit with Ultra Max, inspect the transparent PNG, then move into mockups, layout, vectorization, or production.
Review every file at its intended use size before production.
Image Studio · Edit and refine
Keep the design. Refine the detail.
An edit does not have to mean starting over. Work from the version you like, describe one change, and compare the result before moving on. Review every edit: preservation guidance helps, but it does not lock pixels or guarantee identical details.
A repeatable editing workflow
- Open your artwork in Image Studio, choose Edit Image, and select Ultra Max.
- Keep Subject, Lettering, and Layout selected for details you want carried forward. An explicit change in your prompt takes priority.
- Ask for one change: “Make the sun coral red. Keep the wording, lettering shape, and composition.”
- Apply the edit. Once accepted, the tools close and the canvas shows whether the job is queued, generating, or saving.
- Compare versions. Continue from the result you prefer, or restore an earlier saved version without generating a new image.
Choose precision or speed

Choose Ultra Max Signature for demanding lettering and intricate shapes, or Ultra Max for faster iteration. Both start at Medium. Signature uses more credits, and detail, resolution, and operation also affect the quote. Review the exact total before submitting.
Mode, detail, and saved-version controls appear where enabled. Settings apply to your next request and do not change a job already queued.
Compare Ultra Max modesPreserve the background intentionally
Image Studio edits preserve whether the source is transparent or opaque. Check the result against both light and dark backgrounds. Soft shadows and glows may remain partly transparent.
Use text for Ultra Max edits
Describe the part you want changed in your prompt. Region selection is unavailable for the updated Ultra Max modes while its output quality is being evaluated. Use manual tools when you need exact pixel edits.
Recover without losing your place
Saved versions retain the original and edit lineage. Editing an older version can create a saved branch. If a generation fails, use the recovery action shown and keep its reference ID for support.
In Creative Studio, open an image’s edit action, choose the source output, describe the change, and compare it with its parent or original. Restore the version you want to continue from. Check fine text and subject details after each turn; long editing histories are not a promise of perfect preservation.