
Transparent PNG field guide
Create T-shirt artwork without the white box.
A transparent background is not a color—it is empty image data. This workflow shows how to generate or edit that file, inspect the edges, and decide when it is ready for mockups or print.
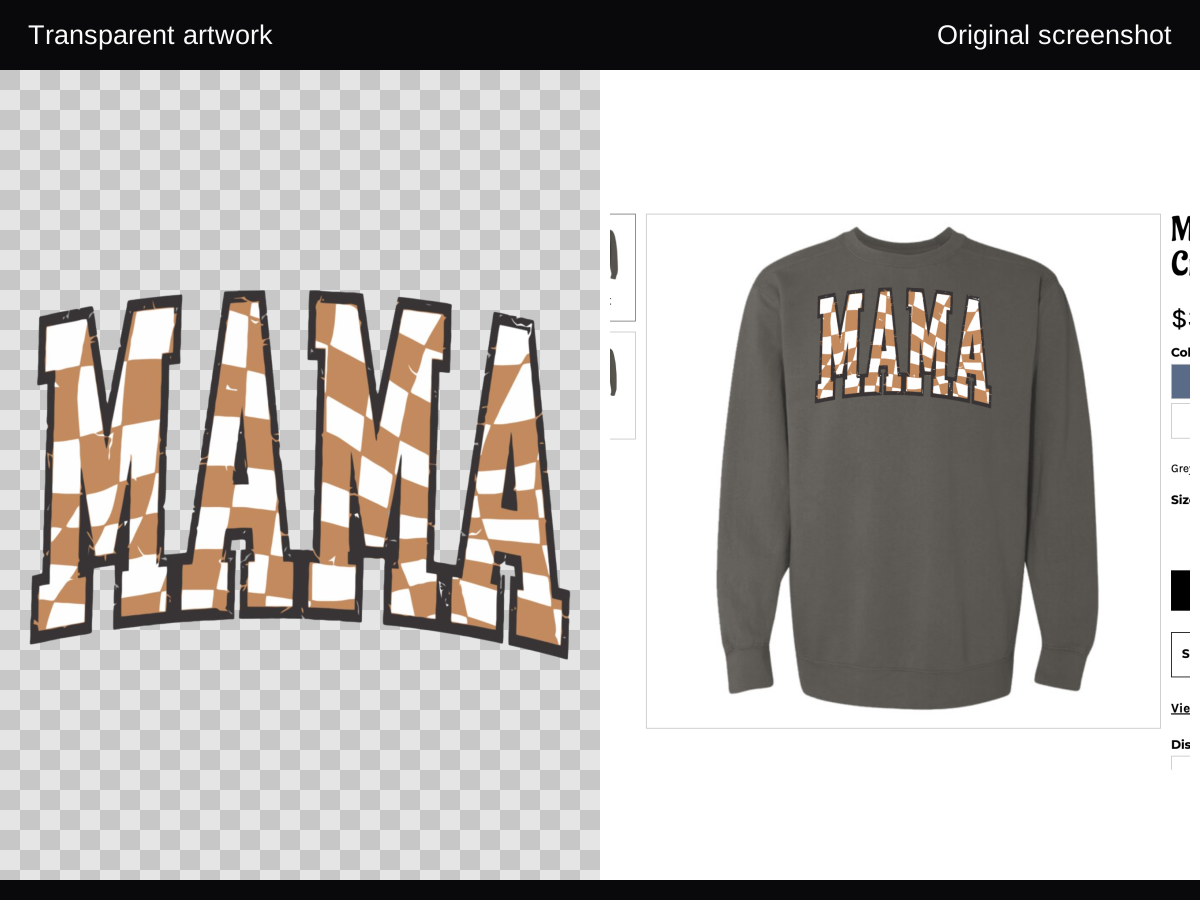
Quick answer
Choose Ultra Max in the T-shirt Designer or Image Studio. Generate or edit the artwork, preview the PNG over contrasting colors, and correct any clipped edge or unwanted halo before production.
Five-step workflow
Choose the right starting surface
Use the T-shirt Designer for a new idea. Use Image Studio when you already have artwork, a mockup, or a garment screenshot to rebuild or edit.
Select Ultra Max
Ultra Max is the DesignGen tier that requests transparent PNG output across generation and edit workflows.
Describe the isolated artwork
Name the subject, lettering, palette, and edge treatment. Say which details must be preserved, especially when editing an existing file.
Review the alpha channel
Preview on light and dark backgrounds. Look for a solid rectangle, white fringe, clipped strokes, or accidental holes inside letters.
Export for the next workflow
Keep the PNG for mockups and raster production. If vector paths are required, finalize the transparent result before continuing to Vectorize.
Generate when the idea is new.
Start in the T-shirt Designer. Keep the prompt centered on the printable subject: describe the lettering, illustration, palette, edge quality, and any detail that cannot be lost.
Edit when the artwork already exists.
Start in Image Studio with the cleanest source available. Tell the edit what to change and what must remain untouched. For garment photos, Screenshot to Design is the shortest route to reconstructed artwork.
Four mistakes to catch before print.
A hidden white rectangle
View the PNG on a dark background. If the image remains boxed, the background is opaque.
A pale edge halo
Check the intended garment colors. Ask for a cleaner isolated edge or perform a targeted cleanup pass.
Lost counters and fine lines
Inspect letters such as A, B, O, and R and thin illustration details at the expected print size.
Unplanned semi-transparency
Glows and shadows can be intentional, but faint artwork may print differently across garment colors.
Print-review checklist
PNG opens successfully and reports the expected dimensions.
Checkerboard or garment color shows through empty areas.
Small type remains readable at final size.
No required stroke is clipped at the canvas edge.
Light and dark garment previews both look intentional.
You own or have permission to reproduce every source element.
Questions creators ask
What is the difference between a white background and transparency?+
White is visible image data. Transparency is an alpha channel that allows the surface behind the artwork to show through.
Why does a transparent image sometimes look white?+
Some viewers display transparency over white. Open the PNG in Image Studio or another editor with a checkerboard or colored preview before deciding the background is opaque.
Can shadows and glows remain in a transparent PNG?+
Yes. They can use partial transparency. Review them on the garment colors you intend to use so they do not create an unwanted box or halo.
Should I use Ultra Max for every concept?+
Use it when you need the final isolated asset or a precise edit. Other tiers can be useful for exploration, especially when transparency is not yet required.
Create the isolated file first. Build the product around it second.
Use Ultra Max for the final transparent pass, review the alpha channel, and continue into mockups or production only when the edge is ready.
