Knockout and Halftone in Image Tools
At a glance
| Topic | Details |
|---|---|
| Best for | Removing a background color from artwork and optionally applying a print-ready halftone before export. |
| Start here | Open Image Tools, upload a JPG, PNG, or WebP, then open Knockout + Halftone. |
| Outcome | A cleaner production-ready result with more control than a basic background removal pass. |
Open it now
Before you start
- Image uploads currently accept JPG, PNG, and WebP up to 5MB in the tool picker flow shown here.
- Preview is immediate. Export is a separate action that can take longer.
- If you came from a draft vector workflow, finalize the vector first before expecting a clean knockout or halftone export path.
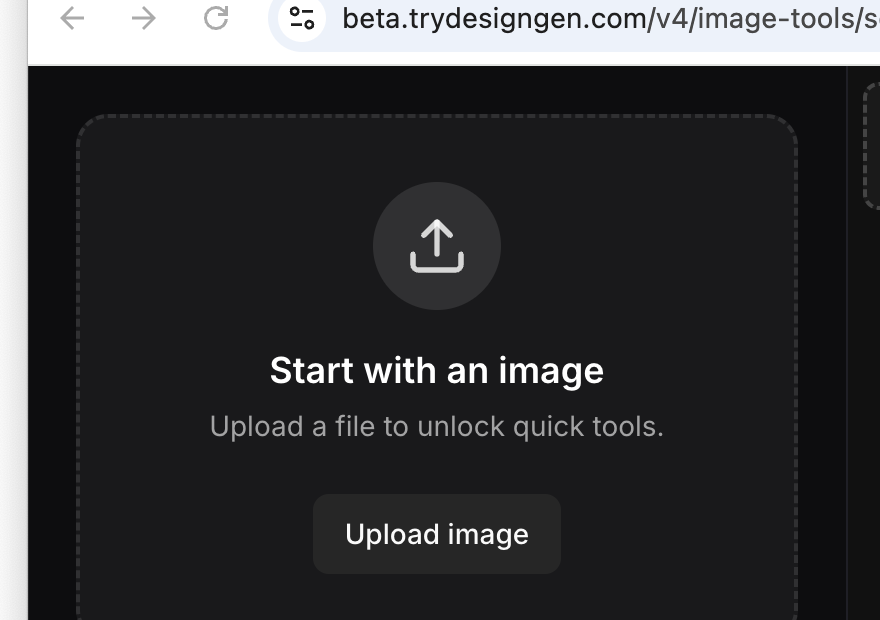
This is where the workflow starts: upload the art first, then the tool-specific controls appear.
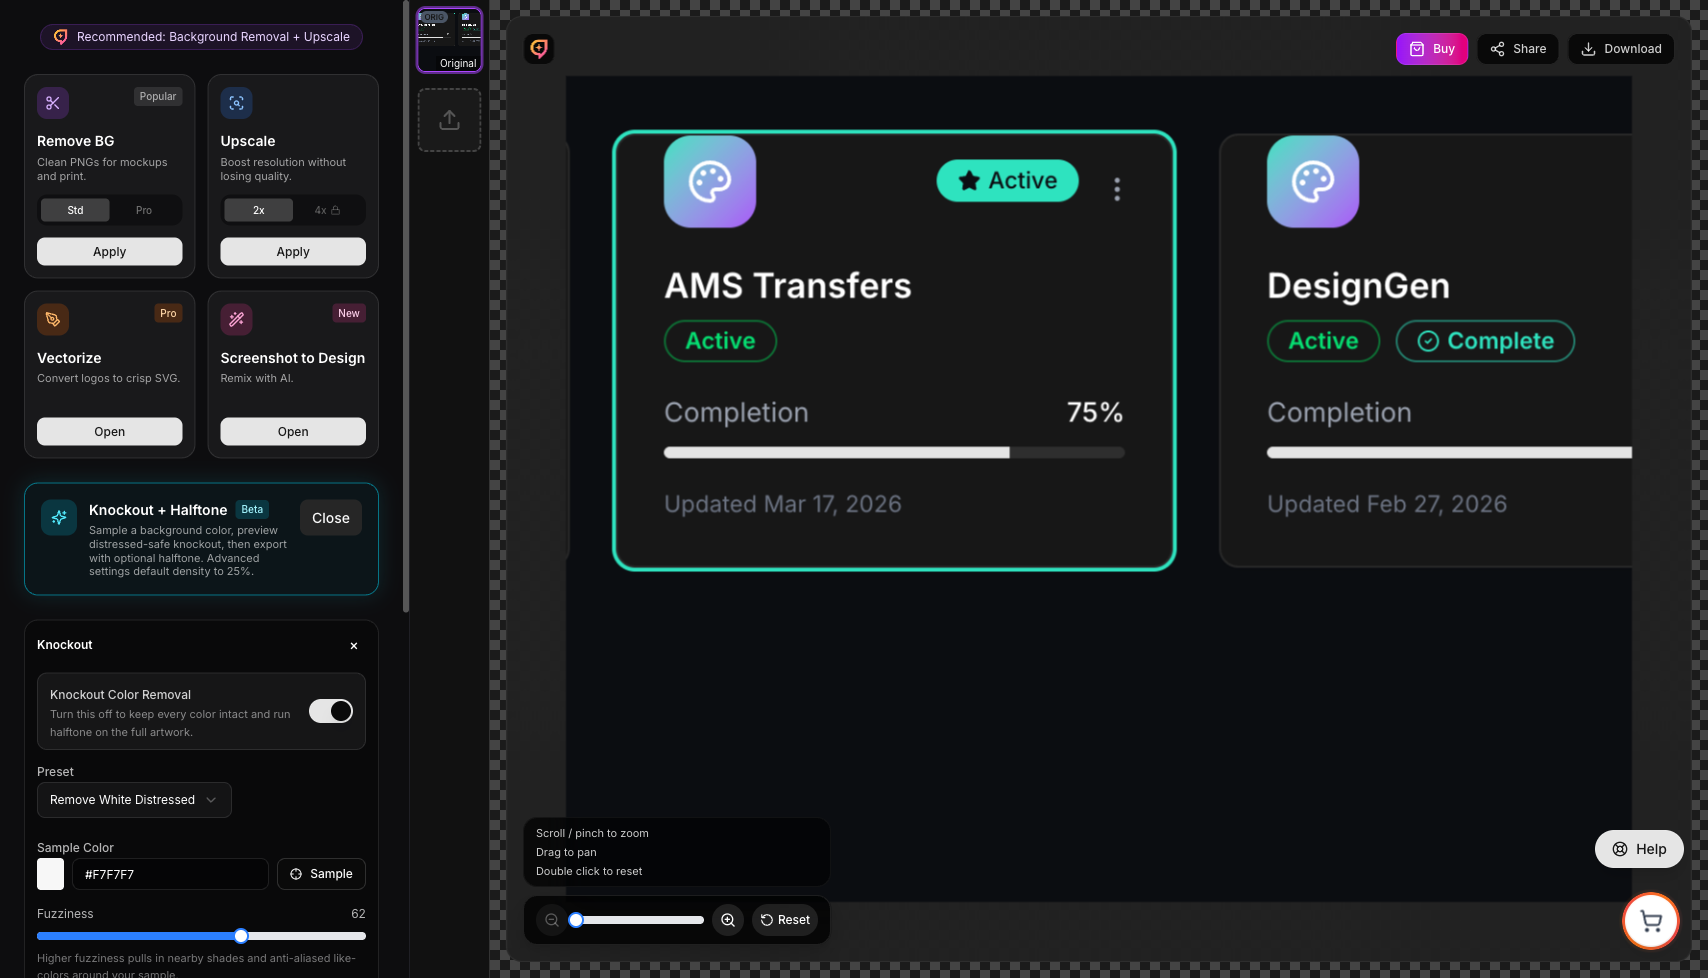
Once an image is uploaded, quick tools and the Knockout + Halftone card become available in the left rail.
What the tool does
- Samples a background color you want removed.
- Uses presets tuned for clean art, distressed art, black fills, or vintage texture.
- Lets you preview the result before export.
- Lets you keep halftone on or off depending on the output you want.
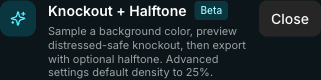
Open this card after upload to move from generic cleanup into print-prep controls.
Presets currently shown in the product
- Remove White Distressed for cracked or worn white overlays.
- Remove White Clean for flatter light fills and cleaner logos.
- Remove Black for dark fills that need to become transparent.
- Vintage Texture Safe for softer distressed texture that should survive cleanup.
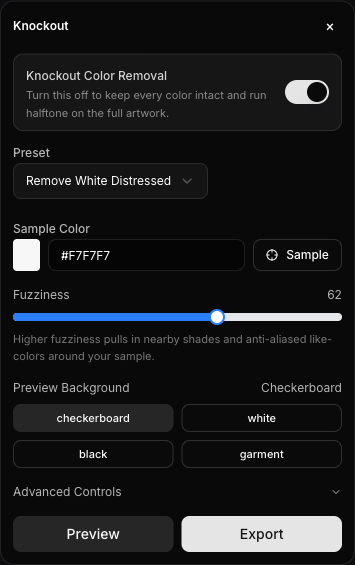
The first control group covers the removal color, preset, fuzziness, preview background, and the basic Preview or Export actions.
Step-by-step
- Upload the artwork.
- Choose Knockout + Halftone.
- Pick the closest preset.
- Use Sample to pick the background color to remove.
- Adjust Fuzziness if the first preview misses edge pixels or removes too much.
- Use Preview Background to check the result on checkerboard, white, black, or garment color.
- Open Advanced Controls only if the default preview still needs help.
- Leave Halftone Export on for print-ready output, or turn it off if you only want the knockout pass.
- Preview first, then export.
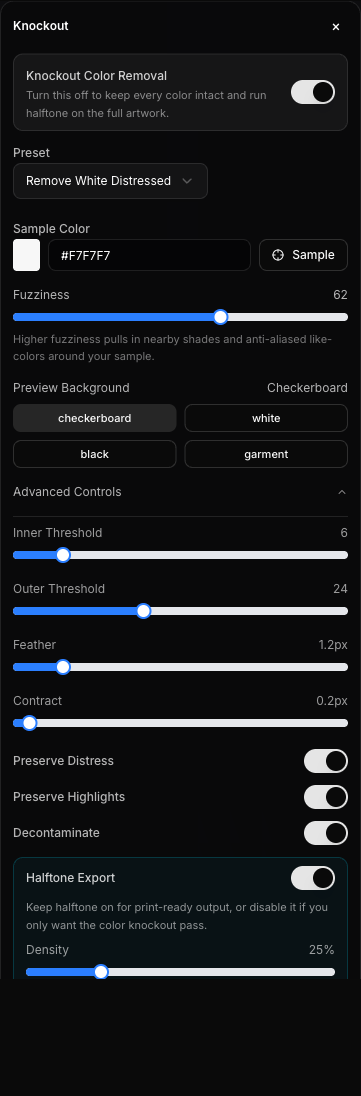
Advanced Controls expose the threshold, feather, contract, distress-preservation, decontamination, and halftone-density settings.
Controls worth learning first
| Control | Why it matters |
|---|---|
| Sample Color | This decides what the tool treats as removable background. |
| Fuzziness | Higher values pull in nearby shades and edge pixels. |
| Preview Background | Shows whether the cleanup still leaves noise around the art. |
| Halftone Export | Controls whether you get dot-screen output or only a clean knockout pass. |
| Density | Changes how strong the halftone screen becomes when halftone is on. |
Advanced controls that matter most
- Inner Threshold controls how aggressively the tool reaches into the sampled color area.
- Outer Threshold controls how far the cleanup reaches into nearby edge tones.
- Feather softens the edge transition.
- Contract pulls the mask inward slightly when a cleaned edge still looks too soft.
- Preserve Distress helps keep worn or cracked texture from being over-cleaned.
- Decontaminate helps reduce leftover color fringe.
Preview before export: If the preview is wrong, the export will be wrong too. Do not skip the preview step.
Threshold rule: Keep the inner threshold below the outer threshold. If those settings cross over, the cleanup usually gets unstable.
Troubleshooting
| Problem | Likely cause | What to try |
|---|---|---|
| The edges still look dirty | The sampled color is too narrow or fuzziness is too low. | Resample the background color and increase fuzziness slightly. |
| The art starts disappearing | The cleanup is too aggressive. | Lower fuzziness and reduce the thresholds before previewing again. |
| The texture looks flattened | Distress-preserving settings are too weak. | Use a distressed-safe preset and keep Preserve Distress on. |
| You only want a clean transparency result | Halftone is still enabled. | Turn off Halftone Export before you export. |
Example: Removing white from distressed art
- Choose Remove White Distressed.
- Sample the light background color.
- Preview on checkerboard first, then on a garment color if the art is for apparel.
- If the texture looks damaged, lower the cleanup pressure and keep distress-preserving settings on.
- Export only after the distressed details still look intentional.